There is a particular form of cooking heartbreak that pizza inflicts on home bakers. You followed the recipe. You let the dough rise. You preheated the oven. And what came out is a tough, chewy, slightly burnt disk that bears no resemblance to the pictures in the cookbook. The good news is that pizza dough failure has only five common causes, and once you can identify which one you are experiencing, the fix is usually one specific adjustment away.
This article is a diagnostic guide rather than a recipe. The same-day dough above is included as a control – a foolproof baseline recipe that, when made correctly, produces an acceptable pizza crust. If your problem persists with this recipe, the issue is technique or environment rather than ingredients. The five failure modes covered below – tough crust, dough that tears, soggy middle, large uneven bubbles, and pale bottom – account for roughly 95 percent of home pizza problems.
For the full advanced recipe with the 72-hour cold ferment that produces restaurant-quality results, see our companion article on Neapolitan-style pizza dough. The rest of this piece is the troubleshooting matrix that takes you from a failed pizza to a good one in the fewest variables changed.
Understanding the Basics: Ingredients and Process
Before we jump into problem-solving, let’s revisit the basics. Pizza dough typically consists of flour, water, yeast, and salt. Each ingredient plays a crucial role in the final product. Flour provides the structure, water hydrates the flour and activates the yeast, yeast ferments the dough, and salt enhances flavor. It’s all about balance and understanding how these elements interact. Here’s the secret: using the right type of flour, like ’00’ flour, can make a world of difference in achieving that perfect chewy yet crispy texture.
Flour Types and Their Importance
Not all flours are created equal. High-protein flours, like bread flour or ’00’ flour, are ideal for pizza dough. They create a strong gluten network that traps gas bubbles, giving your dough a good rise and a chewy texture. I once experimented with all-purpose flour, and while it worked, the results were noticeably less elastic and chewy than when I used bread flour.
Anya Sharma is a passionate home cook and baker with a knack for demystifying complex culinary challenges. Her focus is on creating simple, delicious recipes and empowering fellow food enthusiasts to confidently tackle kitchen woes.
The Role of Yeast and Fermentation
Yeast is like your dough’s little engine. It ferments the sugars in the flour, producing carbon dioxide and alcohol, which causes the dough to rise and develop flavor. Temperature control is crucial here. Yeast thrives between 20-40°C (68-104°F), with peak activity around 36°C (97°F). Too hot, and you’ll kill the yeast; too cold, and it won’t be active enough. A warm spot in your kitchen is your dough’s best friend.
Recommended Sources
- Pizza Today (2024-08-06)
- The Pizza Heaven (2024-06-08)
- Reddit (r/Breadit) (2024-08-03)
- Reddit (r/Pizza) (2024-04-24)
Problem 1: Dough That Won’t Rise (or Rises Too Slowly)
There’s nothing more disheartening than peeking at your dough an hour later only to find it hasn’t budged. This often happens due to inactive or old yeast, incorrect water temperature, or too much salt. In my experience, proofing your yeast before adding it to the flour is a surefire way to know it’s alive and kicking. Mix it with a little warm water (around 100°F) and a pinch of sugar. If it bubbles up in 5-10 minutes, you’re good to go!
Creating the Perfect Rising Environment
Your dough needs a cozy spot to rise. If your kitchen is too cool, find a warmer location like the top of your fridge or inside an oven with just the light on. Once, during a winter pizza night, I discovered my dough preferred the bathroom! The warmth from the nearby heater did wonders.
Adjusting Your Recipe for Better Results
If your dough still struggles, consider adjusting your recipe. Less salt, a tad more yeast, or warmer water can do the trick. Remember, dough is sensitive to its environment. A little tweak goes a long way.
Problem 2: Dough That’s Too Sticky or Too Stiff
Sticky dough can feel like you’re wrestling with a blob, while stiff dough resembles a brick. If your dough is too sticky, it might be due to high hydration or insufficient kneading. I wrote about this before in my guide to sourdough discard recipes where similar principles apply.
Fixing Sticky Dough
To manage a sticky situation, sprinkle small amounts of flour onto your dough until it’s more workable. Alternatively, keep a bowl of water or a bit of olive oil on hand to moisten your hands. It helps control sticking without compromising dough hydration.
Managing Stiff Dough
For dough that’s too stiff, it might need a bit more water. But don’t just dump it in—gently knead in small amounts until the dough feels pliable. Once, I saved a stubborn dough by simply letting it rest longer, allowing the gluten to relax.
Problem 3: Dough That Shrinks Back (Too Elastic)
If your dough snaps back like a rubber band, it’s often due to under-proofing or overly cold dough. Here’s the secret: let it rest. A 30-45 minute rest at room temperature gives the gluten a chance to relax.
Using the Right Flour
Choosing the right flour can also help. ’00’ flour has excellent extensibility, meaning it stretches well. I once switched to ’00’ flour after a particularly frustrating pizza night and never looked back.
Employing Techniques Like Autolyse
An autolyse, which involves mixing the flour and water and letting it sit before adding yeast and salt, can work wonders in making dough easier to stretch. It’s a small step with a big payoff.
Problem 4: Dough That Tears When Stretching
Tearing can be frustrating, often the result of weak gluten development or low-protein flour. If the dough rips easily, consider using flour with a higher protein content or spending a bit more time kneading.
Strengthening Your Dough
To build a stronger dough, ensure you knead properly. Aim for 10-12 minutes by hand or about 8 minutes in a mixer. The dough should be smooth and elastic. If it’s still tearing, let it rest longer before stretching again.
Adjusting Hydration Levels
Proper hydration is key. Aiming for 60-70% hydration typically yields a good texture. I learned this the hard way when I first tried to make my dough wetter for a ciabatta-like texture, only to find it was too weak to handle stretching.
Problem 5: Crust Not Browning or Too Pale
If your crust is looking sad and pale, the oven temperature might be too low, or there might be insufficient sugar in the dough. Preheat your oven to at least 450-500°F for optimum browning. I always use a pizza stone or steel to ensure even heat distribution.
Enhancing Browning with Sugar
A touch of sugar in the dough can help with browning, but don’t overdo it. A teaspoon or so per batch is usually enough. I’ve found it also enhances flavor without making the crust sweet.
Dealing with Excess Flour
Too much flour on the surface can block direct heat contact, preventing browning. Brush off excess flour before placing your dough in the oven. A colleague once pointed this out during a pizza-off, and it made a surprising difference!
Problem 6: Soggy or Doughy Pizza Crust
Nobody enjoys a soggy crust. This can happen from too much sauce, wet toppings, or baking at too low a temperature. One trick I use is pre-baking my crust for a few minutes before adding toppings. It sets the base, preventing sogginess.
Managing Toppings and Sauce
Drain any excess liquid from toppings, and use a thicker sauce. Less is more when it comes to the sauce. A thin layer helps prevent the dough from becoming waterlogged.
The Importance of High Heat
A hot oven is crucial. I preheat my oven with a pizza stone for at least 30 minutes. This mimics the high-heat environment of a professional pizza oven and helps achieve a crispy crust. You can also read more about high-temperature cooking in my sheet pan cooking guide.
Problem 7: Excessive Bubbles in the Crust
Bubbles can be a surprise, but they often occur if the dough isn’t properly docked or is under-proofed. Docking involves pricking the dough with a fork before baking.
Proper Proofing and Docking
Ensure your dough has enough time to proof. If bubbles are still an issue, gently press them out before baking. I remember being told by an old pizza pro to dock my dough twice for extra security against bubbles.
Adjusting Baking Time and Temperature
Consider a slightly longer bake time at a slightly lower temperature to ensure even cooking and bubble control. This method has helped me achieve a balanced crust without sacrificing texture.
Beyond the Dough: Tips for a Better Homemade Pizza
Perfecting the dough is just one piece of the pizza puzzle. For the best homemade pizza, consider the whole picture: quality ingredients, the right tools, and a bit of patience.
Using a Pizza Stone or Steel
A pizza stone or steel is invaluable for achieving a professional-quality crust. It allows for even heat distribution and results in a crispier base. Trust me, once I switched to a pizza steel, my pizzas transformed dramatically.
Experimenting with Flavors and Techniques
Don’t be afraid to experiment. Cold fermentation, where the dough rests in the fridge for 1-3 days, can enhance flavor complexity. I’ve found this technique makes my dough more flavorful and easier to handle.
Pro Tips for Perfect Pizza Dough
Making pizza dough at home can be a satisfying experience, but a few expert tips can enhance your result from good to extraordinary. Here are some practical techniques to consider:
- Measure Accurately: Use a kitchen scale to measure your ingredients. This ensures precision, especially in flour and water ratios, which are crucial for dough consistency.
- Use Cold Water: For a slower fermentation process, consider using cold water. This helps develop more complex flavors over time and results in a better texture.
- Resting Periods: Allow your dough to rest for at least 30 minutes after mixing. This autolyse period helps the flour fully hydrate and can improve gluten development.
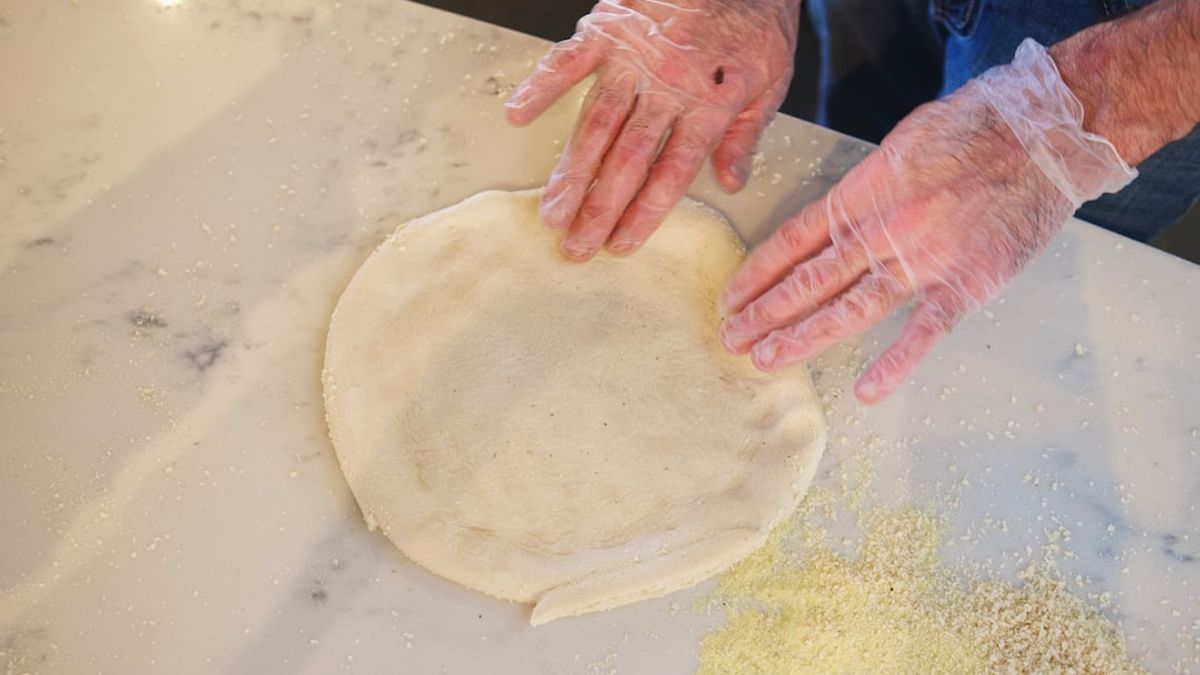
- Stretch, Don’t Roll: When shaping your dough, use your hands to stretch it instead of a rolling pin. This preserves the gas bubbles formed during fermentation, resulting in a lighter crust.
- Preheat Your Oven: Make sure your oven is preheated to a high temperature (ideally around 475°F to 500°F) before baking. This mimics the conditions of a professional pizza oven, giving you a crispy crust.
Common Mistakes to Avoid
Even seasoned bakers can make mistakes when it comes to pizza dough. Here are some common pitfalls to watch out for:
- Skipping the Kneading: Proper kneading develops gluten, which is essential for structure. Ensure you knead the dough adequately, usually around 8-10 minutes by hand or 5-7 minutes in a mixer.
- Ignoring Temperature: Yeast is temperature-sensitive. If your water is too hot, it can kill the yeast; too cold, and the dough won’t rise. Aim for water temperatures between 100°F and 110°F for optimal yeast activation.
- Overworking the Dough: While kneading is important, overworking can lead to tough dough. If your dough feels overly elastic and resistant, it may be over-kneaded.
- Not Using Enough Salt: Salt not only enhances flavor but also controls yeast activity. Too little salt can result in overly rapid fermentation, while too much can inhibit it.
| Ingredient | Amount | Notes |
|---|---|---|
| Flour | 500g | Use high-protein flour like bread flour or ’00’ flour. |
| Water | 325ml | Around 65% hydration for a good dough consistency. |
| Yeast | 7g | Active dry or instant yeast works best. |
| Salt | 10g | About 2% of the flour weight for flavor and control. |
Frequently Asked Questions
What is the ideal fermentation time for pizza dough?
The ideal fermentation time for pizza dough varies, but a cold fermentation in the fridge for 24-72 hours enhances flavor and texture. For a quicker rise, allow the dough to ferment at room temperature for 1-2 hours.
How can I tell if my dough has risen enough?
A well-risen dough should roughly double in size and feel light and airy. You can perform the ‘poke test’: if the indentation remains, your dough is ready to shape.
Can I freeze pizza dough, and if so, how?
Yes, pizza dough can be frozen. After the first rise, divide the dough into portions, wrap each tightly in plastic wrap, and place them in a freezer bag. It can be frozen for up to three months.
What should I do if my dough is too dry?
If your dough is too dry, you can add a little more water gradually while kneading. Alternatively, incorporating a tablespoon of olive oil can also help improve moisture and elasticity.
Conclusion: Practice Makes Perfect Pizza
Remember, every mistake is a lesson. The journey to perfect pizza dough is paved with trial and error, but every attempt brings you closer to pizza perfection. Keep experimenting, and soon, you’ll be serving up pies that’ll have friends and family singing your praises. And if you ever need to troubleshoot more, you can always refer back to my air fryer troubleshooting guide for more tips on perfecting your home-cooked meals.
{“@context”:”https://schema.org”,”@type”:”Article”,”headline”:”Unlock Perfect Pizza: Troubleshooting Your Homemade Dough”,”description”:”Master homemade pizza dough with this comprehensive troubleshooting guide. Solve common problems like sticky dough, no rise, tearing, and soggy crust for perfect, crispy pizzas every time.”,”author”:{“@type”:”Person”,”name”:”Anya Sharma”},”publisher”:{“@type”:”Organization”,”name”:”Cookingzone”},”image”:[“https://cookingzone.org/wp-content/uploads/2025/09/closeup-of-hands-gently-stretching-homem-1757380225867.jpg”],”inLanguage”:”en”}
Pizza Troubleshooting Quick Guide
- Dough too sticky: Add flour gradually, let rest longer
- Crust not crispy: Higher oven temp, thinner dough, less toppings
- Soggy center: Pre-bake crust, drain wet toppings, use less sauce
- Dough won’t stretch: Let rest at room temp, avoid overworking
- Burnt bottom: Lower rack position, reduce temperature
- Cheese not melting: Ensure oven is fully preheated, check cheese quality
Essential Pizza Equipment
- Pizza stone or steel for crispy crust
- Pizza peel for easy transfer
- Kitchen scale for accurate measurements
- Instant-read thermometer for oven accuracy
- Bench scraper for handling dough

Rachel Summers
Rachel grew up in a Pacific Northwest kitchen, learning Sunday roasts from her mother and pie crust from a grandmother who never wrote a recipe down. CookingZone began as a way to save her family's cooking before it was forgotten, and grew when her cousins started sending in their own. Her work covers foundational American, Italian, French, and Mexican recipes, with an emphasis on weekend baking, comfort food, and the techniques that span both European and American home kitchens.
Please note: Nutritional estimates in our recipes are derived from the USDA FoodData Central database and may vary based on specific brands and ingredient sizes. If you have food allergies, dietary restrictions, or medical conditions, consult a registered dietitian or healthcare provider before preparing this recipe. Always follow safe food-handling guidelines, including proper cooking temperatures for meat, poultry, fish, and eggs. Nothing in this article should be interpreted as medical, nutritional, or dietary advice.