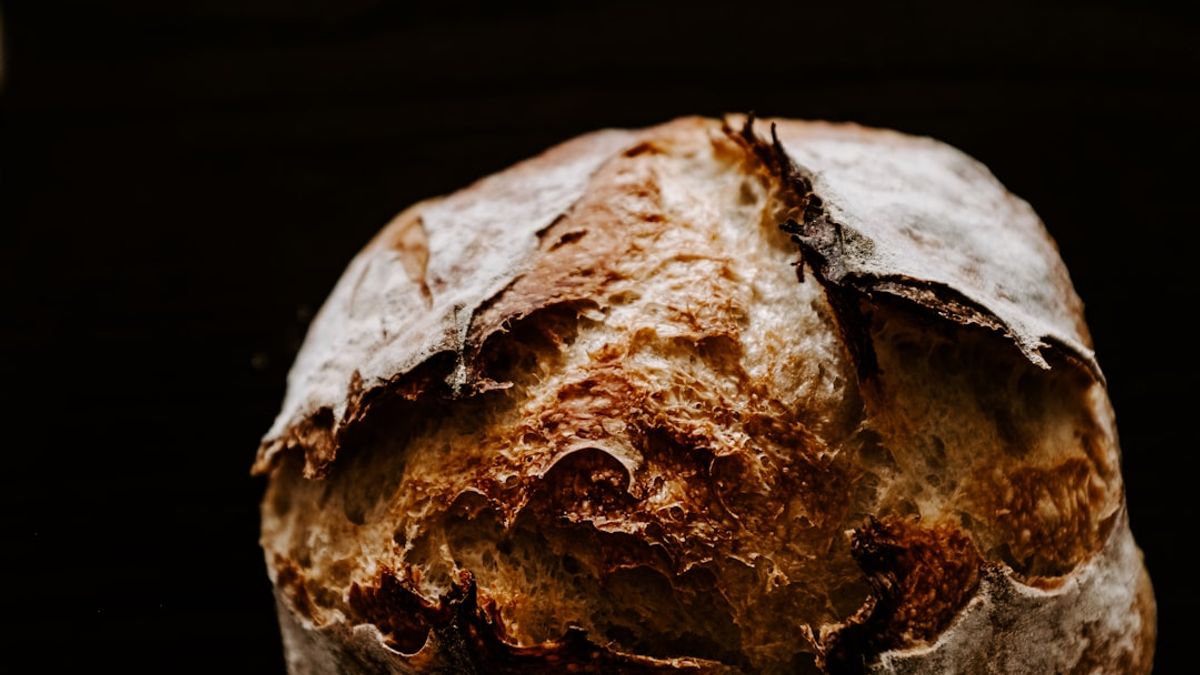
There is a particular kind of disappointment that comes with opening the oven door to a flat loaf of bread. You followed the recipe. You measured the flour. You let it rise for the full hour. And yet the bread sits in the pan like a brick, dense and disappointingly heavy. The problem is almost never your technique. The problem is almost always yeast – and once you understand the four ways yeast can fail, you can diagnose any rising problem in under a minute.
Yeast is a living single-celled fungus (specifically Saccharomyces cerevisiae) that ferments sugar into alcohol and carbon dioxide. The carbon dioxide is what makes bread rise. Yeast can be killed by water that is too hot (above 50°C / 122°F), inactivated by water that is too cold (below 21°C / 70°F for instant yeast), suppressed by direct contact with salt, or simply expired from sitting in the pantry too long. Each problem has its own signature, and each has a specific fix.
This article is a working diagnostic for every dough-rising failure, with the basic sandwich bread recipe above as the canonical test. If this bread does not rise, your yeast is the issue. The rest of the piece walks through the four failure modes, how to identify which one you have, and how to fix each.
Understanding Yeast
Yeast is a single-celled fungus that feeds on sugars and produces carbon dioxide gas and alcohol as byproducts. In bread baking, this carbon dioxide gets trapped in the gluten network, causing dough to rise. The alcohol evaporates during baking.
Yeast is alive, which means it needs the right conditions to thrive: food (sugars), moisture, warmth, and time. Give yeast what it needs, and it will reward you with perfectly risen dough.
Types of Yeast
Active Dry Yeast
This traditional yeast requires proofing (dissolving in warm water) before use. The granules are coated with dead yeast cells that need to be dissolved away. Proof it in water between 105-110°F with a pinch of sugar; it should foam within 5-10 minutes.
Instant Yeast
Also called rapid-rise or bread machine yeast, instant yeast has smaller granules and can be mixed directly into dry ingredients without proofing. It’s more convenient and often more reliable than active dry yeast. You can use about 25% less instant yeast than active dry.
Fresh Yeast
Also called cake yeast or compressed yeast, this perishable form is preferred by professional bakers for its reliable performance and mild flavor. It must be refrigerated and used within 2 weeks. Use about twice as much fresh yeast as active dry.
Common Yeast Problems and Solutions
Problem: Dough Won’t Rise
This is the most common yeast problem, and several factors can cause it:
Dead yeast: Yeast loses potency over time. Check the expiration date and proof your yeast before using it in recipes. If it doesn’t foam, the yeast is dead and won’t raise your bread.
Water too hot: Water above 120°F kills yeast. Water that feels hot to the touch is too hot. Use a thermometer—water should be between 105-115°F for active dry yeast, up to 120°F for instant yeast mixed with flour.
Water too cold: Cold water won’t kill yeast, but it will slow it down dramatically. If your kitchen is cold, use slightly warmer water and let dough rise in a warmer spot.
Too much salt or sugar: While small amounts of salt and sugar are fine (salt strengthens gluten, sugar feeds yeast), too much of either can inhibit yeast activity. Keep salt away from direct contact with yeast when mixing.
Cold environment: Yeast works best at warm temperatures (75-78°F). In a cold kitchen, dough will rise slowly or not at all. Create a warm spot by turning on your oven light, using a proofing box, or placing the dough near (not on) a warm appliance.
Problem: Dough Rises Too Fast
Dough that rises too quickly often results in bread with large holes, poor structure, or a yeasty taste.
Too much yeast: More yeast isn’t better—use the amount specified in the recipe.
Environment too warm: Keep dough below 80°F for controlled fermentation. If your kitchen is very warm, use cooler water and let dough rise in a cool spot or the refrigerator.
Solution: Slow it down: Slower fermentation develops better flavor. Refrigerating dough slows yeast activity while allowing enzymes to develop complex flavors. Many professional bakers use cold fermentation for superior bread.
Problem: Bread Is Dense and Heavy
Dense bread usually means insufficient gluten development or under-proofing.
Under-kneading: Gluten needs to be developed to trap the gas produced by yeast. Knead until dough is smooth, elastic, and passes the windowpane test (stretches thin without tearing).
Under-proofing: Dough needs time to rise properly. It should roughly double in size during the first rise and pass the poke test before baking—press with a floured finger and the indentation should spring back slowly.
Too much flour: Excess flour creates dense bread. Measure carefully and resist the urge to add too much flour when kneading.
Problem: Bread Collapses
Bread that rises beautifully then falls flat is usually over-proofed.
Over-proofing: If dough rises too long, the gluten weakens and can’t hold the gas. When poked, over-proofed dough doesn’t spring back at all. Watch your dough, not the clock.
Rough handling: Be gentle with proofed dough. Punching it down too aggressively or handling it roughly can collapse the structure.
Problem: Bread Has Large Irregular Holes
Improper shaping: Good shaping creates surface tension that results in an even crumb. Take time to shape dough properly and seal any air pockets.
Insufficient punching down: After the first rise, press out large air bubbles before shaping. This redistributes yeast and creates a more even crumb.
Problem: Bread Has a Strong Yeasty Taste
Too much yeast: Follow the recipe precisely.
Rising too fast: Fast fermentation doesn’t allow time for flavors to develop. Slow, cool rises produce better-tasting bread.
Old yeast: Ironically, old yeast can create off flavors even while still being active enough to raise bread.
Best Practices for Working with Yeast
Storage
Store dry yeast in a cool, dry place or in the freezer for longest life. Frozen yeast can be used directly without thawing. Once opened, yeast loses potency faster—use within 4 months for best results.
Proofing Environment
Create an ideal proofing environment by placing covered dough in a turned-off oven with just the light on, or in a microwave with a cup of hot water. The goal is consistent warmth around 75-80°F.
Testing Readiness
- Finger poke test: Press dough with a floured finger. If it springs back slowly and the indentation remains slightly, it’s ready. If it springs back quickly, it needs more time. If it doesn’t spring back at all, it’s over-proofed.
- Visual cues: Dough should roughly double in size and look puffy and airy.
Measuring Yeast
For consistent results, measure yeast by weight rather than volume. One packet of active dry yeast contains about 7 grams or 2 1/4 teaspoons. One packet of instant yeast is also 7 grams but works slightly faster.
Tips for Guaranteed Success
- Use a thermometer – Remove guesswork from water temperature
- Proof your yeast – Even instant yeast can be proofed for extra insurance
- Don’t rush – Good bread takes time; resist the urge to use more yeast
- Control temperature – Keep dough at consistent, moderate warmth
- Watch the dough, not the clock – Rise times vary based on conditions
- Start with simple recipes – Master basic bread before attempting complex ones
- Take notes – Record what works and what doesn’t in your kitchen
Yeast Types Explained
Choosing the right yeast for your recipe can mean the difference between a perfect loaf and a disappointing brick. Each type of yeast has distinct characteristics that affect how you use it, how fast it works, and the flavor it produces. The following comparison breaks down the three main types available to home bakers.
| Characteristic | Active Dry Yeast | Instant Yeast | Fresh (Cake) Yeast |
|---|---|---|---|
| Appearance | Coarse brown granules | Fine tan granules | Soft, crumbly block (beige) |
| Requires Proofing | Yes (dissolve in warm water first) | No (mix directly with dry ingredients) | No (crumble directly into flour or dissolve in liquid) |
| Ideal Water Temperature | 105-110F (40-43C) | 120-130F when mixed with flour | 95-100F (35-38C) |
| Rise Speed | Moderate | Fast (about 50% faster than active dry) | Fast |
| Shelf Life | Up to 2 years unopened; 4 months opened | Up to 2 years unopened; 6 months opened | 2-3 weeks refrigerated |
| Storage | Cool, dry place or freezer | Cool, dry place or freezer | Refrigerator only |
| Conversion Ratio | 1 packet (7g / 2.25 tsp) | Use 25% less than active dry | Use double the amount of active dry |
| Flavor Profile | Mild, traditional bread flavor | Slightly more yeasty than active dry | Mild, clean flavor preferred by professionals |
| Best For | Traditional bread recipes, slower rises | Quick breads, bread machines, everyday baking | Artisan breads, croissants, brioche |
Conversion Tips
When substituting one yeast type for another, the conversion ratios are straightforward. If a recipe calls for one packet (7 grams) of active dry yeast, use approximately 5.25 grams of instant yeast or 14 grams of fresh yeast. When switching from active dry to instant, you can skip the proofing step and add the yeast directly to your dry ingredients, but increase the liquid temperature slightly to compensate.
Osmotolerant Yeast
For enriched doughs containing high amounts of sugar, butter, and eggs (such as brioche, panettone, or cinnamon rolls), consider using osmotolerant instant yeast, sold as SAF Gold. Standard yeast struggles in high-sugar environments because the sugar draws water away from yeast cells through osmosis, slowing fermentation. Osmotolerant strains are specifically bred to thrive under these conditions, producing more reliable rises in sweet doughs.
Temperature Guide for Proofing
Temperature control is arguably the single most important factor in successful yeast baking. The following guide covers optimal temperatures at every stage of the bread-making process, from mixing through final proof.
Water Temperature for Mixing
The temperature of the water you add to yeast determines whether fermentation gets off to a strong start or a stalled one. Water that is too hot kills yeast cells outright. Water that is too cold leaves them dormant. Always use a kitchen thermometer rather than guessing by touch, as the difference between perfect and lethal can be just 10 to 15 degrees.
| Temperature Range | Effect on Yeast | Recommendation |
|---|---|---|
| Below 70F (21C) | Yeast is alive but dormant; very slow or no fermentation | Too cold for proofing; use for long cold fermentation only |
| 70-80F (21-27C) | Slow, steady fermentation; excellent flavor development | Ideal for overnight or extended proofing |
| 80-90F (27-32C) | Active fermentation; good balance of speed and flavor | Standard proofing range for most bread recipes |
| 95-110F (35-43C) | Rapid fermentation; reduced flavor complexity | Use for proofing active dry yeast in water before mixing |
| 110-120F (43-49C) | Yeast begins to weaken; some cells start dying | Upper safe limit only when yeast is mixed with flour (insulation effect) |
| Above 120F (49C) | Yeast dies rapidly; fermentation stops permanently | Never expose yeast to water above this temperature |
Desired Dough Temperature
Professional bakers aim for a final dough temperature between 75F and 78F after mixing. This is called the Desired Dough Temperature (DDT), and it accounts for the combined effects of room temperature, flour temperature, friction from mixing, and water temperature. To calculate the ideal water temperature for your conditions, use this formula: multiply your DDT by 4, then subtract the room temperature, flour temperature, and friction factor (typically 25 to 30 degrees for a stand mixer). The result is the water temperature you should use.
Creating the Ideal Proofing Environment
If your kitchen is cooler than 75F, you need to create a warmer environment for proofing. Several methods work reliably:
- Oven with light on: The interior temperature with just the oven light turned on typically reaches 78-82F, which is ideal for proofing. Place your covered dough on the center rack.
- Microwave method: Heat a cup of water in the microwave for 2 minutes, then place your covered dough inside with the hot water. The steam and warmth create a humid proofing environment.
- Proofing box: Dedicated proofing boxes allow you to set an exact temperature. They are worth the investment for serious bakers who bake multiple times per week.
- Cooler with warm water: Place a bowl of warm water in a large insulated cooler alongside your dough. The cooler traps heat and maintains a stable temperature for several hours.
Cold Fermentation Benefits
Retarding dough in the refrigerator (38-40F) for 12 to 72 hours dramatically improves flavor. During cold fermentation, enzymatic reactions continue breaking down starches into sugars even though yeast activity slows to a crawl. The result is bread with deeper, more complex flavor, better crust color from increased available sugars for caramelization, and a more open crumb structure. Many professional bakeries consider cold fermentation an essential step, not an optional shortcut.
Frequently Asked Questions
Can I substitute different types of yeast?
Yes! For active dry, use 25% less instant yeast. For fresh yeast, use about double the amount of active dry. Proof active dry yeast; instant can go directly into flour.
How do I know if my yeast is still good?
Proof it: dissolve in warm water with a pinch of sugar. It should foam within 5-10 minutes. No foam means dead yeast.
Does salt kill yeast?
Salt doesn’t kill yeast at levels used in bread, but it does slow it down. Avoid putting salt directly on yeast when mixing ingredients.
Can I freeze bread dough?
Yes! Freeze after the first rise, then thaw in the refrigerator overnight and bring to room temperature before shaping and proofing.
Conclusion
Yeast is far less finicky than its reputation suggests. By understanding what yeast needs—moderate warmth, moisture, food, and time—you can troubleshoot problems and consistently bake beautiful bread. Pay attention to temperature, don’t rush the process, and watch your dough rather than the clock.
With practice, working with yeast becomes intuitive. You’ll recognize when dough is properly proofed, understand how your kitchen conditions affect rise times, and know exactly what adjustments to make. Soon, you’ll wonder why yeast ever seemed intimidating at all.
Start with simple recipes, pay attention to the principles in this guide, and enjoy the deeply satisfying process of baking bread from scratch. There’s nothing quite like a warm loaf of homemade bread, and now you have all the knowledge you need to make it happen.
Sources & References
Essential Bread Making Tips
Temperature plays a crucial role in bread making. Yeast thrives between 75-80°F. Too hot kills yeast; too cold slows fermentation. Use an instant-read thermometer to check water temperature before mixing.
Proper kneading develops gluten, creating the structure that traps gas and gives bread its texture. Knead until the dough is smooth and springs back when poked.
Steam during the first few minutes of baking creates a crispy crust. Place a pan of water in the oven or spray the loaf with water before baking.

Rachel Summers
Rachel grew up in a Pacific Northwest kitchen, learning Sunday roasts from her mother and pie crust from a grandmother who never wrote a recipe down. CookingZone began as a way to save her family's cooking before it was forgotten, and grew when her cousins started sending in their own. Her work covers foundational American, Italian, French, and Mexican recipes, with an emphasis on weekend baking, comfort food, and the techniques that span both European and American home kitchens.
Please note: Nutritional estimates in our recipes are derived from the USDA FoodData Central database and may vary based on specific brands and ingredient sizes. If you have food allergies, dietary restrictions, or medical conditions, consult a registered dietitian or healthcare provider before preparing this recipe. Always follow safe food-handling guidelines, including proper cooking temperatures for meat, poultry, fish, and eggs. Nothing in this article should be interpreted as medical, nutritional, or dietary advice.