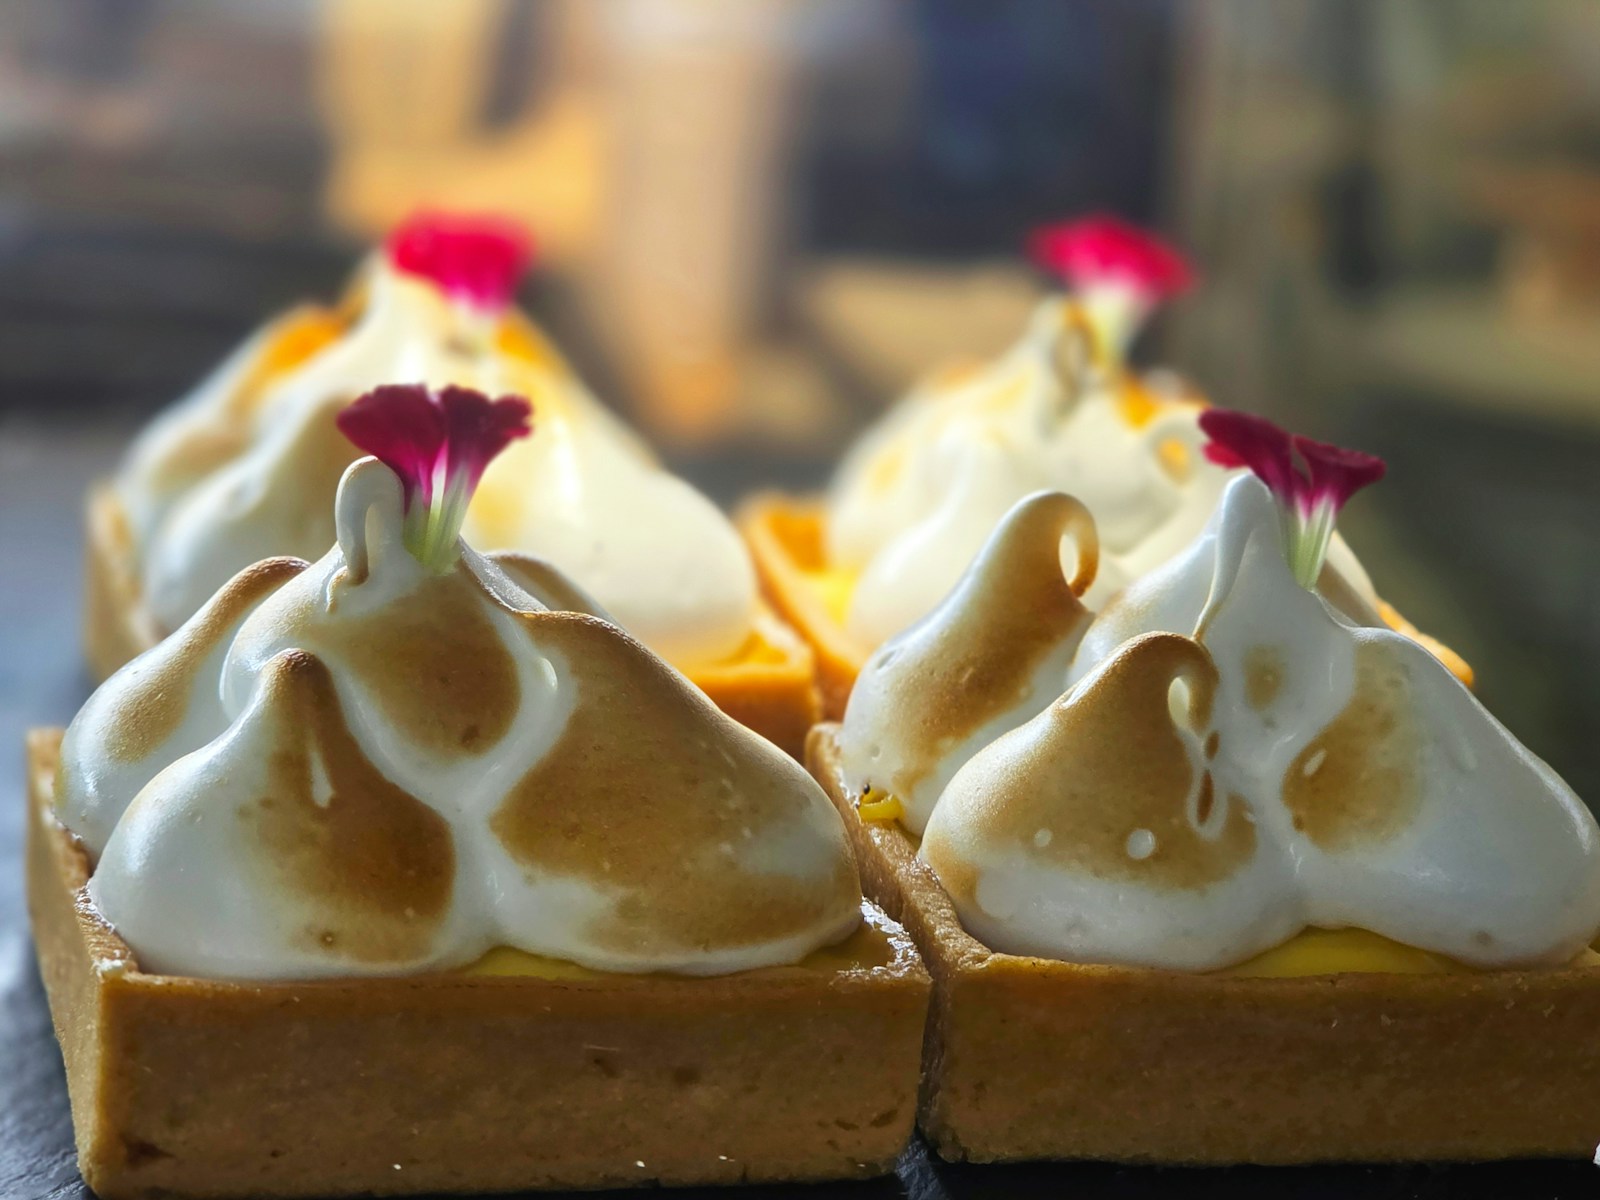
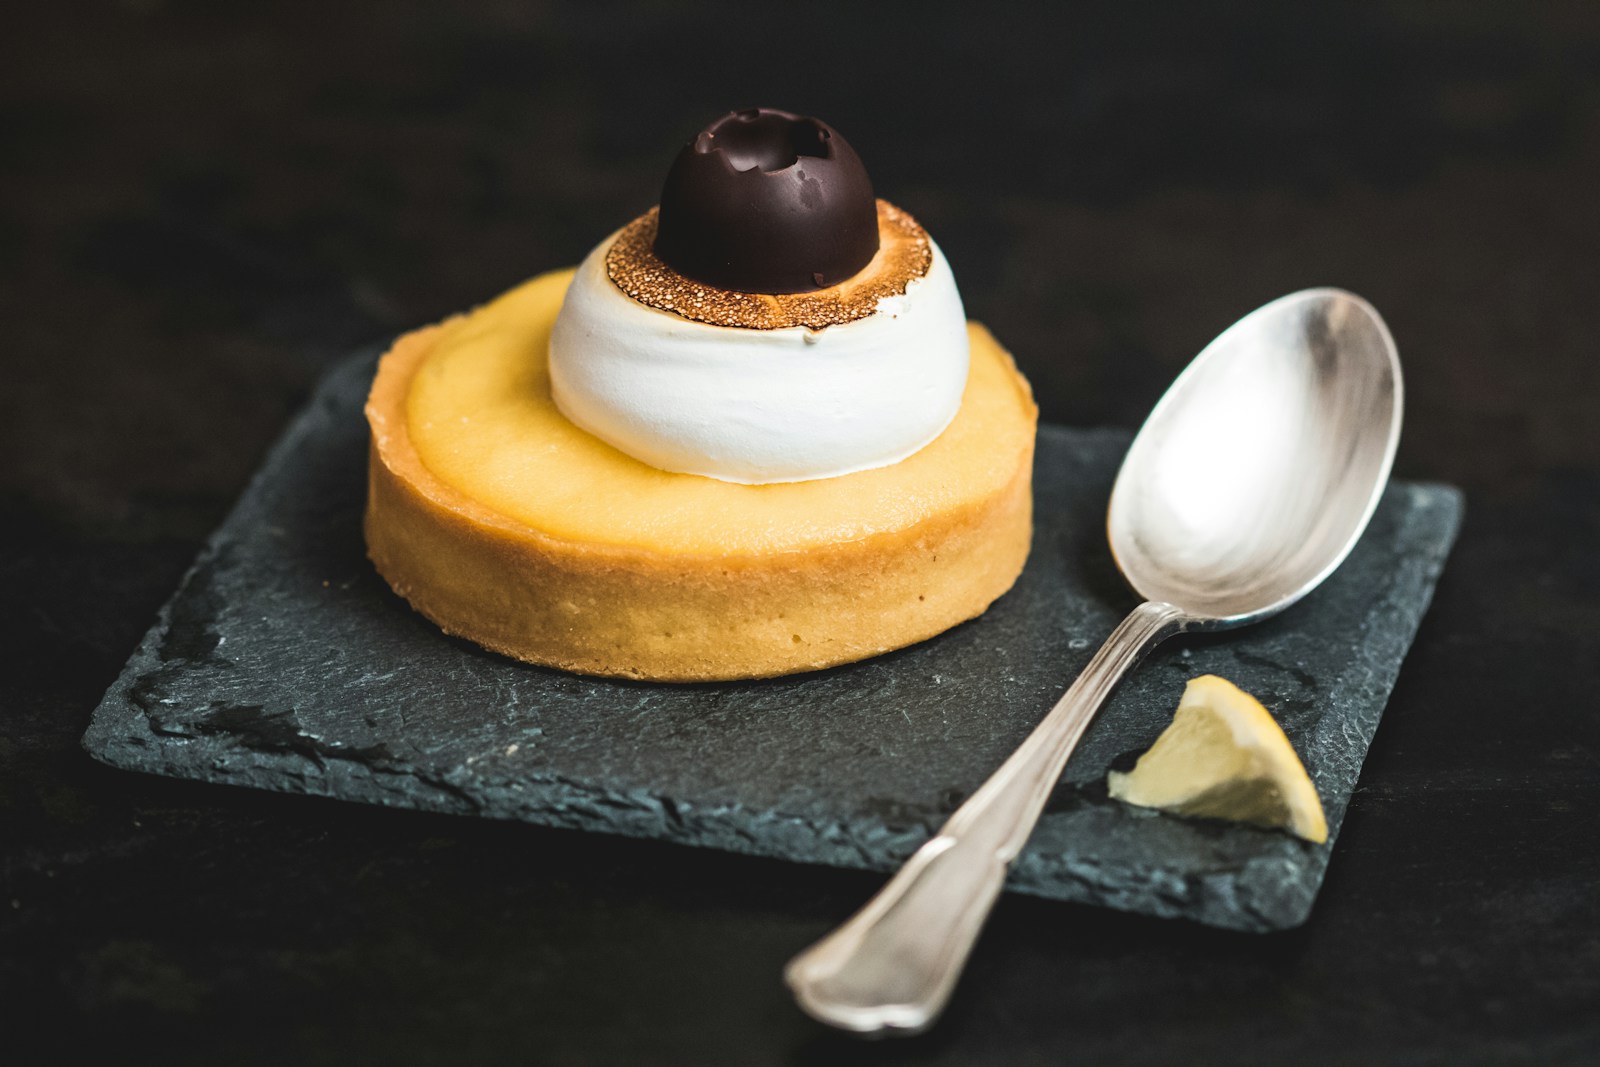
The torch clicks. A blue flame appears. You pass it across the white peaks of meringue, slowly, letting the heat catch each ridge. The surface browns in seconds — gold at first, then amber, then the deeper caramelized tips that separate a tart from a dessert. Underneath, the lemon curd trembles. The crust holds firm. And the whole thing smells, for a moment, of burnt sugar and citrus and a kitchen in Paris in 1880.
Tarte au citron meringuée is the French pastry world’s answer to restraint. It contains nothing strange. No exotic ingredient, no difficult-to-source equipment, no flavor combination that surprises. It is butter, flour, eggs, sugar, lemons, and a flame. That is all. What makes it difficult — and what makes it, when done well, one of the most elegant desserts in any canon — is that every component must be made with attention. The crust cannot be soggy. The curd cannot be grainy. The meringue cannot weep. There is nowhere to hide. The tart is either excellent or it is obviously wrong, and you know within one bite which it is.
Pierre Hermé, who has built one of the most celebrated pastry houses in the world, wrote in Larousse des Desserts that the tarte au citron is “the dessert that taught me pastry.” It is the dessert that teaches everyone pastry, because it asks you to do four distinct techniques in sequence — a shortcrust, a stovetop curd, a sugar syrup, a whipped meringue — and to do each one well. Get this tart right and you have unlocked the foundational moves that show up in half the classical French repertoire.
The Crust: Sablé Breton, Not Pâte Sucrée
Most lemon tart recipes call for pâte sucrée — the standard French sweet shortcrust. I prefer sablé breton, a butter-rich cousin from Brittany that is shorter, sandier, and more forgiving. The name means “Breton sandy” and describes exactly the texture you are aiming for: a crumb that shatters under the fork into buttery particles, not a clean snap like a cookie. The difference comes from the ratio — sablé breton uses about 1 part butter to 2 parts flour, and adds egg yolks rather than whole eggs. The result bakes into a golden, tender base that stays crisp for twenty-four hours under a wet curd filling without softening.
Start with cold butter. This is the single most common crust failure I see in home kitchens: butter that has been left on the counter too long. Warm butter produces a dough that is greasy and difficult to roll, and bakes into a crust that is hard rather than crumbly. Cube the butter while it is still firm, then work quickly. The entire mixing process in the food processor should take less than thirty seconds. As soon as the dough just begins to come together — not fully kneaded, not a smooth ball — stop. Turn it out. Press into a disk. Wrap. Chill.
The Curd: Double Boiler, Always
The second failure point: curd cooked on direct heat. A saucepan over a low flame seems like the efficient choice. It is not. Egg yolks coagulate at 149°F. Direct heat can push the bottom of the pan to 180°F in seconds while the top is still 100°F. The result is scrambled eggs in pockets — grainy, visibly lumpy curd that strains but never quite recovers its silkiness.
A double boiler — a heatproof bowl set over a pot of barely simmering water, not touching the water itself — provides indirect steam heat that never exceeds 180°F at the bowl surface. This gives you a ten-minute window in which to cook the curd gently to around 170°F, the sweet spot where the proteins fully thicken but do not scramble. You will whisk continuously for the full ten to twelve minutes. Your arm will get tired. This is correct. Do not stop.
The butter is added off the heat, cube by cube, in the finishing step. This is where the curd transforms from a cooked lemon mixture into a glossy, silken spread. The cold butter tempers the residual heat, emulsifies with the egg fats, and gives the curd its characteristic sheen. Add too fast and the emulsion breaks. Add slow, whisking until each cube disappears before the next goes in. A digital thermometer helps — pull the curd off the heat the moment it reads 170°F, and the rest follows.
The Meringue: Italian, Not French
There are three meringues in classical pastry, and they are not interchangeable. French meringue is raw egg whites whipped with granulated sugar — the simplest and most common, but also the least stable. It must be baked to set, or it will deflate within hours. Swiss meringue heats the whites and sugar together over a water bath before whipping, which partially cooks the whites and yields a stable, marshmallow-soft texture. Italian meringue, the most technical of the three, streams a hot sugar syrup cooked to soft-ball stage (238°F / 114°C) into whipping egg whites, which cooks the whites thoroughly and produces a stiff, glossy meringue that holds its shape for a day or more.
For a tart topping that is torched rather than baked, only Italian meringue works. It is food-safe without further cooking, it browns evenly under flame without collapsing, and it holds its piped peaks and swirls sharply enough to photograph beautifully. French meringue is too raw and too fragile. Swiss meringue torches adequately but has a softer, almost gummy texture that looks and feels amateur. The Italian meringue is worth the extra effort for this specific application. A candy thermometer or digital probe thermometer is essential — guessing at the syrup temperature will ruin the batch.
Component Comparison Table
Knowing what each technique contributes makes troubleshooting faster when something goes wrong.
| Component | Key Technique | Chief Risk | Doneness Marker |
|---|---|---|---|
| Sablé Breton crust | Cold butter, short mix | Tough from over-kneading | Golden edges, pale center |
| Lemon curd | Double boiler, constant whisking | Grainy from scrambled egg | Coats spoon at 170°F |
| Italian meringue | Sugar syrup at 238°F streamed in | Gritty from undissolved sugar | Stiff, glossy, bowl-inversion-proof |
| Torched finish | Even flame, moving constantly | Burnt spots, curd melting | Amber peaks, white valleys |
Ingredients
Sablé Breton crust:
- 1¼ cups (160 g) all-purpose flour
- ½ cup (60 g) powdered sugar
- ¼ teaspoon fine sea salt
- ½ cup (113 g) cold unsalted butter, cubed
- 2 large egg yolks
- 1 teaspoon pure vanilla extract
Lemon curd:
- ¾ cup (180 ml) fresh lemon juice (from 5 to 6 lemons)
- Zest of 3 lemons, finely grated
- ¾ cup (150 g) granulated sugar
- 4 large eggs
- 4 large egg yolks
- ½ cup (113 g) cold unsalted butter, cubed
- Pinch of fine sea salt
Italian meringue:
- 3 large egg whites (at room temperature)
- ¾ cup (150 g) granulated sugar
- ¼ cup (60 ml) water
- ¼ teaspoon cream of tartar
- ½ teaspoon pure vanilla extract
Making It
- Make the crust. Pulse flour, powdered sugar, and salt in a food processor for two seconds. Add the cold butter cubes and pulse six to eight times, one-second pulses, until the mixture resembles coarse sand with some pea-sized bits of butter still visible. Add the yolks and vanilla. Pulse four or five more times, just until the dough begins to clump and pull away from the sides. Do not let it form a ball. Turn out onto a clean counter, press into a six-inch disk, wrap in plastic, and chill for one hour.
- Roll and press. Unwrap the chilled dough and place between two sheets of parchment. Roll to 1⁄8 inch thick, turning occasionally to keep it even. Transfer to a 9-inch tart pan with a removable bottom — use the parchment to flip it in. Press gently into the bottom and up the sides. Trim excess dough with a knife or the rolling pin rolled across the top edge. Dock the base all over with a fork. Return to the refrigerator for thirty minutes. Preheat the oven to 350°F.
- Blind bake. Line the chilled crust with parchment and fill with pie weights (dried beans work if you do not have ceramic weights). Bake for twenty minutes. Carefully lift out the parchment and weights. Return the crust to the oven for another eight to ten minutes until the bottom is golden and fully cooked — no pale or shiny patches. Cool completely on a wire rack. This can be done up to a day ahead.
- Make the curd. Bring an inch of water to a gentle simmer in a small saucepan. Set a heatproof bowl (metal or glass) on top — the bowl should fit snugly but not touch the water. In the bowl, whisk together the lemon juice, zest, sugar, eggs, yolks, and salt until smooth. Whisk continuously over the steam for ten to twelve minutes. The mixture will start thin and pale, then gradually thicken and darken to a pale yellow. It is ready when it coats the back of a spoon and a finger drawn across leaves a clean line — or when a thermometer reads 170°F.
- Finish the curd. Remove the bowl from the heat. Immediately add cold butter two or three cubes at a time, whisking until each is fully melted and incorporated before adding more. Pour the finished curd through a fine-mesh sieve into a clean bowl — this catches any zest shreds or micro-coagulated egg bits and ensures a perfectly smooth texture. Pour the warm curd directly into the cooled tart shell and smooth the top with an offset spatula. Refrigerate for at least three hours, ideally overnight, until the curd is fully set and the crust has had time to cool through.
- Make the Italian meringue. In a small saucepan, combine the sugar and water. Stir once to moisten, then do not stir again — agitating the syrup once it is heating will cause crystallization. Cook over medium-high heat until a thermometer reads 238°F (soft-ball stage). While the syrup cooks, start whipping the egg whites with cream of tartar in a stand mixer on medium speed. When the whites reach soft peaks, reduce the mixer to medium-low and slowly drizzle the hot syrup down the inside of the bowl, avoiding the whisk. Increase to high and whip for five to six more minutes until the meringue is stiff, glossy, and the bowl feels cool to the touch. Beat in the vanilla.
- Assemble and torch. Pull the chilled tart from the refrigerator. Transfer the meringue to a piping bag fitted with a large star tip, or spoon it directly onto the tart and create decorative swirls with the back of a spoon. Cover the curd completely, pulling up tall peaks for maximum visual drama. Pass a kitchen blowtorch over the meringue in smooth, moving strokes. The flame should catch the peaks first, then work down into the valleys. Stop when the peaks are amber and the valleys are golden — the whole thing should look like toasted marshmallow against snow.
- Serve. The tart is best within two hours of torching, though it holds up to six hours covered loosely with foil. Cut with a hot dry knife — run the blade under hot water and wipe dry between each slice. The contrast of temperature and texture — cold set curd, warm toasted meringue, cool crisp crust — is the thing to showcase.
Make-Ahead Strategy
This tart can be broken into stages across two days. Day one: bake the crust, make the curd, fill the crust, refrigerate. Day two, a few hours before serving: make the meringue, top, torch, serve. The crust can be baked up to forty-eight hours ahead and stored at room temperature under foil. The curd-filled crust keeps in the refrigerator for up to three days — in fact, the flavor improves after twenty-four hours as the zest oils integrate. The meringue is the one component that should always be made fresh. An Italian meringue made more than six hours in advance will start to weep and soften, regardless of refrigeration. This is why bakers and pastry chefs plan the meringue as a within-the-hour task.
What to Serve With It
A lemon tart with torched Italian meringue is already complete on the plate. It needs nothing. But if you want to build a dessert course around it, a small scoop of unsweetened whipped crème fraîche on the side provides a cool, tangy counterpoint that the meringue’s sweetness invites. A few fresh raspberries scattered on the plate work beautifully — the tartness echoes and extends the lemon, and the red against the gold and white is almost too photogenic. A glass of Sauternes or late-harvest Riesling is the classic French pairing.
If you are planning a full dinner menu with this as dessert, keep the earlier courses light and non-acidic to let the tart’s brightness land with full impact. A simple roast chicken with herbs, or a delicate fish like sole meunière, is the French standard. For more no-bake and lightly set desserts in this same family of technique, see our matcha white chocolate panna cotta and brown butter carrot cake — different desserts, same attention to detail.
Storage
An unmeringued, curd-filled tart keeps for up to three days, covered tightly with plastic wrap, in the refrigerator. Once topped with Italian meringue, it is best within twelve hours and at most twenty-four. The meringue will begin to weep moisture onto the curd after that point, and the torched surface softens. Freezing is not recommended at any stage — the curd becomes grainy on thaw and the meringue collapses entirely. For the cleanest slice, keep the tart refrigerated until the moment before serving, then cut with a knife run under hot water and wiped dry between slices.
Frequently Asked Questions
Why Italian meringue instead of French meringue?
Italian meringue is stabilized by hot sugar syrup cooked to 238°F, which partially cooks the egg whites as they whip. This makes it safe to eat without further baking, holds its shape for hours, and browns cleanly under a torch. French meringue (whites whipped with granulated sugar) is delicate, contains raw eggs, and must be baked to stabilize. Swiss meringue (heated over a water bath) is stable but has a softer, marshmallow-like texture. For a no-bake torched topping, Italian meringue is the only professional choice.
Can I make this tart without a torch?
Yes, but the result is less dramatic. Place the meringue-topped tart under a broiler on high for 60 to 90 seconds, watching constantly. The meringue will brown unevenly and the heat may slightly melt the curd beneath. A decent handheld kitchen torch costs about 25 dollars, lasts years, and produces a far superior result with precise control. For this recipe, a torch is the one tool that is genuinely worth the investment — it also opens up crème brûlée, flambéed fruit, and any number of other finishing tricks.
What is the difference between Meyer lemons and regular lemons here?
Meyer lemons are a cross between a lemon and a mandarin orange — sweeter, less acidic, and with floral notes that regular Eureka or Lisbon lemons do not have. In this tart, Meyer lemons produce a rounder, gentler curd with a softer profile. Some bakers prefer it, others find it lacking punch. If using Meyer lemons, reduce the sugar in the curd by two tablespoons to balance. Regular lemons produce the brighter, more traditional French patisserie flavor that most people will recognize as classic.
Why did my lemon curd turn out grainy?
Grainy lemon curd is curdled egg — the yolks scrambled because the heat was too direct. Two essential fixes: use a double boiler rather than a direct-heat saucepan (gentle steam heat prevents coagulation), and whisk continuously throughout the ten to twelve minute cooking time. Strain the finished curd through a fine-mesh sieve to catch any zest bits or micro-clumps. If the curd is already badly curdled, it cannot be saved — start over with lower heat and more patience.
Sources
- King Arthur Baking — Classic Lemon Meringue Tart — A tested reference recipe with detailed technique notes.
- Serious Eats — How to Make Italian Meringue — Stella Parks’s technical guide to sugar syrup temperatures and egg white stability.
- USDA FoodData Central — Eggs, Butter, Sugar — Nutritional data used for per-serving calculations.
Each serving contains roughly 418 calories, 6 g protein, 24 g fat, 46 g carbohydrates, and 1 g fiber — based on 8 servings using a 9-inch tart pan.
Please note: Nutritional estimates are derived from the USDA FoodData Central database and may vary depending on specific brands and component sizes. This recipe contains dairy, wheat, and eggs. Nothing in this article should be interpreted as medical or dietary guidance. If you have food allergies, egg sensitivities, or specific dietary needs, consult a registered dietitian or healthcare provider before preparing this recipe.

Elena Vasquez
Elena learned to bake from her abuela on a family farm in the south of Spain - wood-fired ovens, breakfast bread before sunrise, and a tia who taught her pastry between long lunches with cousins. At CookingZone she develops desserts, pastry, breakfast, healthy recipes, and beverages - from protein-rich morning bowls to classic French patisserie and viral bakery hits. She still tests every dessert on the same crew of family and friends before it makes it onto the site.