Introduction: Embracing the Art of Smoking
A Brief Overview of Smoking as a Cooking Technique
Smoking meats—ah, this is where barbecue turns into art. It’s not just grilling; it’s an ancient cooking technique that uses low temperatures and wood smoke to infuse flavor while slowly tenderizing the meat over hours. I mean, think about it: thousands of years ago, folks discovered that keeping meat near smoldering embers did more than just cook it — it preserved it and added layers of complex flavors you can’t get any other way. It’s magical, really. Now, don’t panic if you’re new to this or worried it’s all too technical. Trust me, in my tiny home kitchen (which is basically a glorified shed with a smoker tucked in one corner), I’ve learned that smoking meats is half science, half intuition… and 100% rewarding.
The Unique Flavors and Textures Achieved Through Smoking
Here’s the secret: smoking produces flavors you simply can’t replicate with other methods. The slow dance between smoke particles and meat fibers creates an earthy aroma and a tender texture that melts in your mouth like butter on warm cornbread. You get this beautiful smoke ring—yeah, that pink layer beneath the crust—that’s actually a sign of proper chemical reactions during smoking. It signals that you’ve nailed the process (more on achieving this later). And then there are textures: crisp bark outside with juicy tenderness inside — that’s what we’re after here. I remember my early days fumbling around with uneven heat—ended up serving tough brisket at my own family cookout once. My cousin still teases me about “that chew-fest.” Every mistake is a lesson though… so let’s dive deeper to avoid yours.
Essential Equipment for the Home Smoker
Different Types of Smokers: Pros and Cons
Alright, so you want to start smoking meats at home? First step: choosing your weapon. There are many smoker types out there but let me break down the main contenders: – **Charcoal smokers:** The classic choice for purists like me who enjoy fiddling with fire control. They demand attention but reward you with deep smoky flavors that electric just can’t match. Downsides? You need patience and practice keeping temps steady.
– **Electric smokers:** Perfect for beginners or those who want convenience without sacrificing too much flavor. These babies keep temps precise but sometimes miss out on rich wood-smoke complexity.
– **Pellet smokers:** Kind of a hybrid—using compressed wood pellets fed automatically to maintain temp & smoke levels. Super convenient and delivers consistent results; however, they tend to be pricier.
– **Offset smokers:** For traditionalists craving authentic barbecue pit vibes; they require hands-on fire management but create amazing bark thanks to indirect heat flow. When I first started, I went straight charcoal because well… nothing beats lighting lump charcoal under hardwood chunks at dawn (although almost burned down my fence once). If you’re juggling work/family life like me now though, pellet smoker might just save your sanity — speaking from experience!
Must-Have Tools and Accessories
No mise en place means no glory! Here’s what every serious home smoker needs on their bench: – Digital meat thermometer (wireless if possible): Nothing ruins smoked meat faster than guessing internal temps.
– Water pan/tray: Helps regulate humidity inside smoker keeping things moist.
– Wood chips/chunks based on flavor preference (we’ll talk woods next).
– Heat-resistant gloves & tongs.
– Spray bottle filled with apple juice or vinegar mix (for spritzing).
– Aluminum foil or butcher paper (to wrap meats during resting phase). Once messed up big time by relying solely on ambient temperature gauges instead of probing internal temps – result was dry pork shoulder disaster akin to shoe leather! Don’t do what Oliver Reed did—invest in reliable thermometers early. If you want extra pointers on prepping ingredients efficiently check out my guide to Mastering the Art of Knife Skills. Proper prep sets foundation even before heat hits.
Choosing the Right Wood for Flavor
Exploring Various Wood Types and Their Flavor Profiles
Wood selection isn’t some minor detail—it *makes* or breaks your smoked recipe because each type imparts unique aromas: – **Hickory:** Strong bacon-like punch; great for beef & pork but can overpower delicate meats if overused.
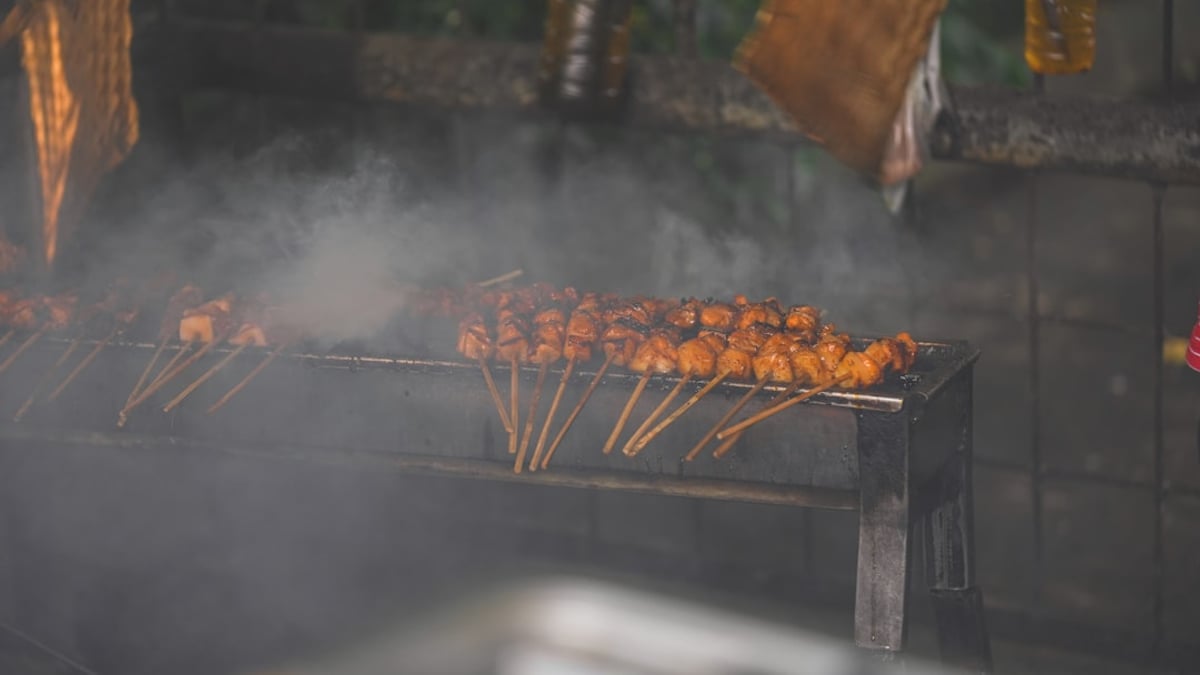
– **Mesquite:** Intense smokiness perfect for bold cuts but tread lightly unless you’re chasing robust Texas-style BBQ.
– **Applewood:** Mildly sweet & fruity; excellent with poultry or fish when you want subtle smoke notes.
– **Cherry:** Slightly tart yet sweet flavor complements most red meats beautifully.
– **Pecan:** Nutty profile somewhere between hickory & fruit woods; versatile option for various proteins. Years back in my tiny home kitchen adventures—I learned mesquite works wonders on ribs but using it alone on salmon made things… well “over-smoked” shall we say? So blending woods is sometimes necessary—a practice common among pitmasters aiming for balance.
Pairing Wood With Different Types of Meat
Here’s something practical — never blindly grab wood without considering your protein: | Meat Type | Recommended Wood |
|—————|——————————-|
| Beef Brisket | Hickory + Oak |
| Pork Shoulder | Applewood + Pecan |
| Ribs | Cherry + Hickory |
| Poultry | Applewood or Maple |
| Fish | Alder or Fruit Woods | Mixing woods lets you experiment—and keeps your barbecue fresh rather than one-note dullness creeping in after multiple cooks. By the way, I’ve found throwing small chunks intermittently rather than big logs helps keep smoke lighter over extended sessions—don’t overwhelm your palate! As mentioned previously in my article about flavor pairings, balance is everything—even when dealing with fire.
Smoking Techniques for Tender and Juicy Results
Understanding Temperature Control Basics
I swear temperature control could be its own PhD subject… But here’s how I tackle it practically without losing my mind: Keep smoker steady between 225°F–250°F (107°C–121°C) — ideal range for low ‘n slow magic happening inside cooker chamber. Anything hotter speeds up cooking risking dryness; colder means longer wait times plus potential bacterial growth risk if undercooked internally—so always err safe! Don’t rely solely on vents’ numbers alone; use digital thermometers both inside chamber AND inserted into thick
est part of meat itself—you must know exactly what’s going on inside before pulling trigger on any decisions.
The Art Of Low And Slow Cooking For Maximum Tenderness
Low-and-slow isn’t trendy hype—it’s legit how collagen breaks down turning tough cuts buttery soft while locking moisture deep within fibers. Here’s how I approach brisket in my backyard setup:
1) Start early morning
2) Season overnight
3) Smoke till internal temp hits ~165°F (~74°C)
4) Wrap tightly in butcher paper (“Texas Crutch”) plus rest covered loosely wrapped until final target temp (~203°F /95°C)
5) Rest again before slicing thin This multi-step patient method ensures flavorful bark formation AND melt-in-mouth tenderness avoiding drying mistakes I’ve seen rookies make rushing straight through stages without patience.
Tips For Achieving That Perfect Smoke Ring
That glowing pink band beneath bark = professional badge—but it’s misunderstood sometimes as purely aesthetic. It comes from nitric oxide binding with hemoglobin caused by combustion gases reacting at low temperatures shortly after smoking starts—not fake news! To boost chances getting beautiful ring: – Keep temps low initially, – Avoid opening lid frequently letting heat/smoke escape, – Use fresh charcoal + seasoned hardwood chips/chunks, – Don’t apply sugary rubs too soon—the sugars may caramelize blocking ring formation Smoke rings don’t affect taste directly but give cool bragging rights next time friends ask “How’d ya do that?”
Meat Selection and Preparation
Choosing The Right Cuts Of Meat For Smoking
Not all cuts deserve equal treatment here—it pays off selecting pieces built tough enough for long cooks yet benefit hugely from breakdown processes happening during smoking: – Brisket flat point combo: iconic Texas BBQ star requiring hours – Pork shoulder/butt: fatty marbled goodness breaking down into pulled pork perfection – Spare/rack ribs: best done carefully trimmed removing silverskin membranes – Whole chickens/turkeys also play nice if managed well For beginners starting smaller cuts like chicken thighs saves headache before moving onto large muscle monsters demanding constant monitoring such as briskets which nearly drove me insane first attempts!

Preparation Techniques Like Trimming, Brining And Dry Rubbing
Good prep equals half success achieved BEFORE hitting smoker door: 1) Trim excess fat wisely—not all removed since some protects meat maintaining juiciness during lengthy cook 2) Brining optional but highly recommended especially poultry—for enhanced moisture retention (I prefer simple salt-sugar-water solutions soaking overnight) Side note here—I once forgot brine timer ran out leaving whole turkey sitting uncovered all day… ended up dry as desert air… every mistake is a lesson! 3) Dry rubs add bold flavor layers pre-smoking combining salt/spices/sugar balancing sweetness+heat Experiment freely here mixing paprika/cumin/chili powder/brown sugar variations building personalized profiles matching chosen wood/meat combos You want detailed rub recipes? Check my other guides covering spice blends globally—they’ll elevate every bite beyond basics effortlessly.
Recipes To Get You Started
Let me walk you through three rock-solid classic smoked dishes anyone can tackle right away at home—with full ingredient lists plus instructions following my tried-and-tested methods proven in countless backyard feasts! — Pulled Pork Shoulder:
(Serves 8) Ingredients:
• 5 lb pork shoulder/butt
• ¼ cup kosher salt
• ¼ cup brown sugar
• 1 tbsp smoked paprika
• 1 tbsp garlic powder
• 1 tbsp onion powder
• 1 tsp black pepper
• Wood chunks – preferably applewood/pecan mix
Instructions:
1) Trim excess fat leaving thin protective layer.
2) Mix salt/sugar/paprika/powders/pepper creating dry rub.
3) Coat pork evenly rubbing spices into crevices.
4) Refrigerate overnight wrapped tight.
5) Prepare smoker @225°F adding soaked wood chunks.
6) Place pork fat side up onto grill grate indirect heat zone.
7) Smoke ~8 hrs maintaining steady temp spraying apple juice mist every hour after first two hours.
8) Once internal temp reaches ~195°F remove pork wrapping foil or butcher paper sealing juices.
9) Let rest min 45 minutes then shred pulled style using forks dragging along grain direction.
10) Serve piled high alongside coleslaw/brioches/hot sauce garnish choices!
— Smoked Brisket:
(Serves approx 12)
Ingredients:
• Whole packer brisket (~12 lbs)
• Kosher salt + coarse black pepper equal parts dry rub base
• Optional garlic/onion powders mixed within rub
• Oak/hickory wood chunk combo preferred
Instructions:
1) Trim silver skin membrane carefully leaving some cap fat intact.
2) Apply generous even coat seasoning mixture massaging deeply into surface.
(Yes this takes time—a pain but trust me totally worth effort!)
3) Preheat smoker steady @225°F inserting oak+hickory chunks regularly
4) Position brisket fat side up indirectly away from flames leaving room airflow around cut.
5) Smoke until probe thermometer reads ~165°F (~8 hours depending thickness).
6) Wrap tightly butcher paper/or foil slowing thermal loss creating stall break zone,(my favorite trick learned long ago).
7 ) Continue cooking till final target temp reaches ~203°F checking periodically avoiding overshoot!!*seriously important*< br/> 8 ) Rest wrapped minimum one hour before slicing across grain super thin slices served immediately .< br/> — Smoked Salmon Fillets:< br />
( Serves four ) Ingredients : < br /> • Four skin-on salmon fillets (~6 oz each)< br /> • Salted water brine :½ cup kosher salt ,½ cup brown sugar ,4 cups cold water < br /> • Alder wood chips preferred mild fruit aroma Instructions : < br />
1 ) Dissolve salt+sugar fully stirring water placing salmon submerged covered refrig overnight min six hours . < br /> 2 ) Remove rinse briefly pat dry paper towels .< br /> 3 ) Set smoker mid-temp around175–180 ° F inserting alder chips soaked slightly dampened preventing flare-ups . < br /> 4 ) Place fillets skin side down wire rack maintaining even spacing allowing circulation .< br /> 5 ) Smoke gently four-five hours monitoring closely avoiding overheating drying flesh !! Best texture achieved tender moist flaky finish . — Experimentation encouraged! Mix rubs adapt woods tailor these templates fitting season/local tastes meanwhile mastering fundamentals taught earlier chapters will speed up progress impressively.
Oh—and please check out *my detailed guide* about batch cooking methods because smoked leftovers reheat fantastic saving future busy weeknights stress ([Mastering Batch Cooking](https://cookingzone.org/2025/09/09/mastering-batch-cooking-simple-steps-for-delicious-stress-free-weeknight-meals/) shows tricks).
Troubleshooting Common Smoking Problems
Things rarely go perfect first try—I’ve been there tons times hanging over cooler ash pits swearing quietly while trying fix mishaps.(One unforgettable episode included dropping whole brisket *face-first* onto gravel parking lot… yeah.) Don’t sweat failures—they’re gold mines teaching resilience outdoorsman spirit essential behind smoking mastery. Here are frequent issues tackled head-on:
- Uneven Cooking:
- Avoid overcrowding racks limiting airflow.
- Create direct vs indirect zones strategically managing hot spots.
- Add chimney starter coals gradually balancing heat spikes.
- Tough Or Dry Meat:
- Mistake often linked poor temperature control either too hot fast cooking ends drying out interior.
- Select appropriate fatty cuts providing natural insulation.
- Bitter Or Harsh Smoke Flavor:
- This usually happens burning unseasoned green/wet wood producing unwanted chemicals.
- Select properly dried seasoned hardwoods only!
- No Visible Smoke Ring After Long Cook?
- Makes sense preserving moisture low flame start crucial creating nitrogen oxides inducing ring formation.
- Slight spritz acidulated liquid early phases enhances reaction visually evident afterward.
- Maintaining/Cleaning Smoker :
- Regular empty ash pans prevent blocked air intake disrupting combustion process.
- Use stainless steel brush scrubbing grates post-cook stops build-up easing next session prepping quick restart cycle gains valuable extra smokey fuel time rather than guesswork late night fumblings handling messy soot clumps…
s
Don’t panic if facing problems; we can fix this stage by stage improving skills versus gadgets madness hunting
nonexistent perfection myth online sometimes advertised relentlessly nowadays—I’m guilty spending wasted money chasing gear upgrades forgetting fundamentals matter most anyway…
Conclusion: Elevate Your Culinary Skills With The Art Of Smoking
Well actually let me rephrase that better… Smoking isn’t just another cooking method – it’s transforming raw ingredients through patient care into something transcendentally delicious worthy sharing among family/friends celebrations lasting memories beyond simple meals offered elsewhere commercially which often lack soul depth connection born watching ember glow slow evenings accompanied chirping crickets subtle breeze scent mingling fragrant plumes escaping chimney vent lovingly nurtured hand-crafted skill sets refined daily backyard rituals imperfect yet cherished deeply real experiences growing food passion built brick-by-brick familiar rustic traditions personal touches anyone willing learn open heart/mind embracing adventure along smoky trails paved true barbeque legends past present future alike…. If there’s one takeaway? Do not fear experimenting boldly blend flavors confidently focus mastering temperature discipline practicing mise en place consistently documenting results noting improvements patiently repeated faithfully… I wrote about this before in my guide to elevating everyday cooking through flavor pairings—you’ll find solid crossover tricks enriching any smoked recipe setting! So put apron on fire up smoker take brave step beyond grill confines exploring smoky horizons bursting layered textures primal aromatic pleasures awaiting discovery right outside your door—inspired by old school knowledge fused modern insight cultivated decades learning hard-earned lessons firsthand behind wooden fences rural neighborhood edges reminiscent cozy corners nestled humble little refuge aka “my tiny home kitchen.” Remember always friend… Every mistake is a lesson—and together—we’ll turn novice jitters into confident pitmaster swagger soon enough! By: Oliver Reed
Why You Can Trust Me: I’m a Smoking meats and have been exploring mastering beyond the grill: mastering the art of smoking meats at home for unforgettable flavor: chef‑level tips you’ll actually use in my tiny home kitchen for years. Everything I share comes from personal experience—real kitchens and hands-on practice—not just theory.

